
By Tabitha Sewer, Brother Ambassador, Sewing and Fashion Blogger and Entrepreneur
The virus has taken a toll on all our lives this year. It has completely turned all of our goals and plans for this year upside down. Rather than wallowing in self-pity over something I have no control over, I decided to see the positive side of all of this. Since building my home a few years ago, I never had the time to style it the way I really wanted. Now, with all the time in the world, I jotted down which rooms needed a makeover and what exactly I wanted to do with them.
The first project we took on at the start of quarantine was our back patio. This space was a muddy landing under the patio that stored my husband’s tools. This space was no doubt an eye sore. Before starting, we sat down as a family and discussed what each of us wanted the outcome to look like. Since vacations were off-limits this year, it was very important to us that this space had a relaxing, tropical vibe that could transport our minds away from everything that’s going on in the world.
My husband and I created a budget, planned out each project that we would complete in this space and moved forward with completing this transformation. We hired a professional to pour and level the concrete for the foundation of our new patio. To keep costs down, my husband and I laid the marble porcelain tile ourselves and even built our own couch.
The styling of the space was easy enough since I created a mood board with elements that we desired to have in this space. In two months time, our new back patio transformed into a backyard tropical oasis. When we step into this space, we literally feel like we are walking into a resort.
Some projects around the house don’t require an extensive timeline or huge budget. There are small, inexpensive projects that can be done to elevate your home and create an impactful moment.
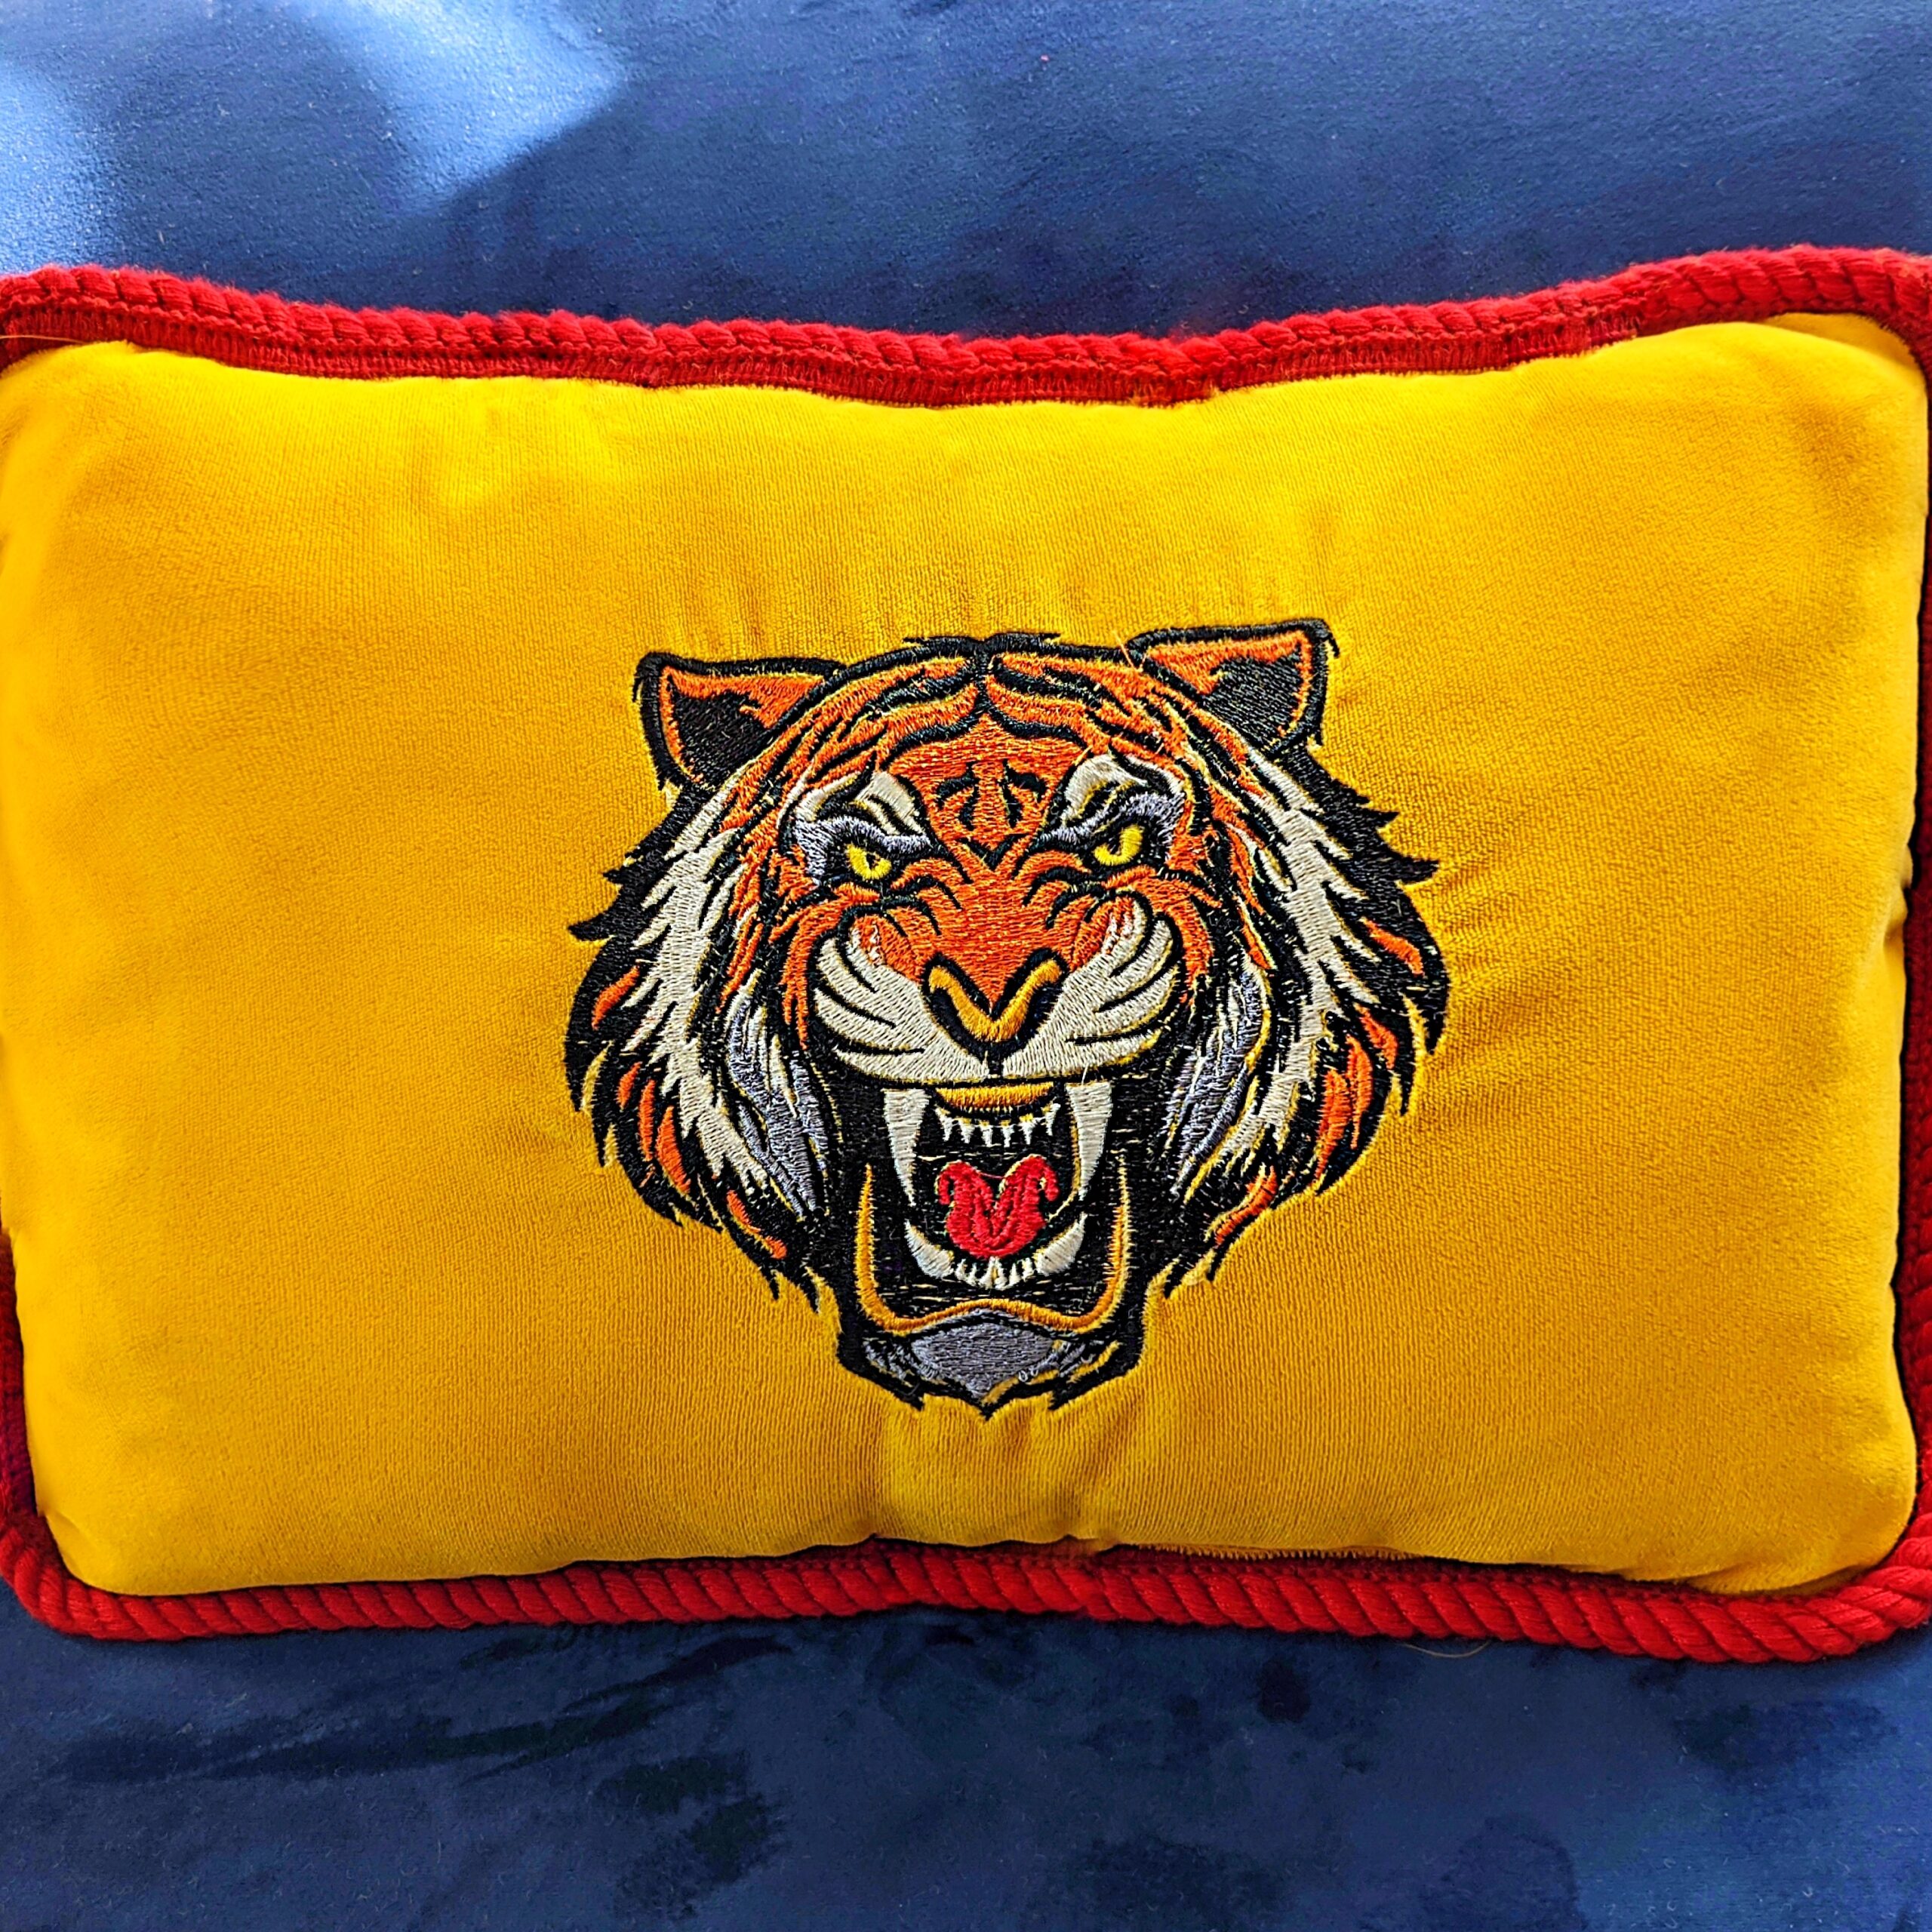
We have a vintage velvet couch in our home that I found at a local thrift store for only $10. When we bought it, it looked extremely tattered and was on its last leg. We tore apart the fabric and cushions and refurbished it into the blue velvet couch we have today. This couch is most definitely beautiful enough to stand alone, but when I came across some designer velvet pillows online, I thought it would pair really well with the couch. So, I decided to make them.
As a Brother Ambassador, I love being able to share my love for Brother sewing machines. I use my machines to create my handmade wardrobe as well as projects around my home. Sewing has a stigma of being a craft that our grandparents would enjoy. I’m here to tell you that sewing isn’t for your grandmother’s anymore. I like to share sewing from a millennial’s point of view; recreating designer projects for less. With social media, inspiration is all around us. Being able to sew what inspires me is something I truly enjoy. Sewing allows me to have access to the things I want without breaking the bank.
So, get after it and feel empowered to create at home. You can upcycle old jeans into shorts during this Summer heat or get quality fashion without breaking the bank. While a pandemic absolutely doesn’t mean you have to come out with a new skill, after all we are just trying to get through each day with our friends and families. But, it can be a time that we come together, inspire and create to release some steam. Here’s how I created this designer-inspired velvet pillow to match my home.
Designer-Inspired Velvet Pillow
Materials:
- Brother Stellaire Innov-is Sewing Machine
- Embroidered Thread in Various Colors
- Large Square embroidery Hoop
- Tiger Embroidery File (6 in.)
- ½ yard Velvet Fabric
- 1.5 yards Braided Trim
- ½ yard Pellon Sol-U-Film Wash Away Embroidery Stabilizer
- Sulky Self- Adhesive Tear Away Stabilizer
- 15” x 11” Pillow Insert
Note: You can purchase your embroidery file from Etsy as there are many available options.
Instructions:
- Take your Pellon Sol-U-Film Stabilizer and lay it directly on top of your velvet fabric. Take both and hoop it into your embroidery hoop. Make sure both the stabilizer and fabric are pulled taut inside the hoop. The stabilizer allows your machine to embroider on top of the fabric without the threads getting lost inside the texture of the velvet. Without it, you would not be able to make out the design.
- Flip the entire hoop upside down and attach the Sulky Self- Adhesive Tear Away Stabilizer. Be sure to press the stabilizer onto the fabric with your hands, making sure that it stays in place. This stabilizer is important because it gives the fabric and design more stability. It helps the design hold its shape without tugging on and distorting the quality of the delicate velvet fabric.
- Once the hoop is set up, place it inside your sewing machine. Set your machine up for embroidery and start. Keep an eye on your machine as it stitches to make sure that your machine doesn’t run out of thread as it stitches.
- When your embroidery design is complete, remove it from your machine. Tear away the Pellon Sol-U-Film Stabilizer that was on top of the velvet fabric and tear away the Sulky Self- Adhesive Stabilizer that was underneath. This should be an easy process.
- With the tiger centered on the fabric, cut the velvet fabric in the following dimensions: 15.5” x 11.5”. Cut two.
- Lay your fabric with the tiger embroidery facing up, pin the braided trim along the outer edge of the front of your pillow making sure the braid is facing the center of your pillow. It may be difficult to stitch the trim perfectly around the corners of your fabric, so be sure to curve around each corner.
- Stitch the braided trim in place by sewing as close to the braid as possible. Be sure to remove the sewing pins as you sew along. When you get to the end of your trim, fold it towards the center of your fabric to prevent the ends from showing on the outside of your pillow.
- Take the back side of your pillow case, the second velvet fabric you cut previously, lay it directly on top of the first. Make sure the right side of the velvet fabric are facing each other. (The wrong sides of the velvet fabrics should be facing the outside). Pin in place.
- Sew around the outer edge of your pillow using the braided trim as a guide. Leave 6 inches unsewn on the bottom edge of the pillow.
- Turn pillow right side out. Push out all four corners of your pillow with a blunt tool being careful not to poke a hole through your fabric. Your design should now be on the outside of your pillow.
- Folding your pillow insert in half tightly, place it inside of your pillow case.
- Fold the back edge of your unsewn fabric to the inside about a ½ inch. Top stitch in place.